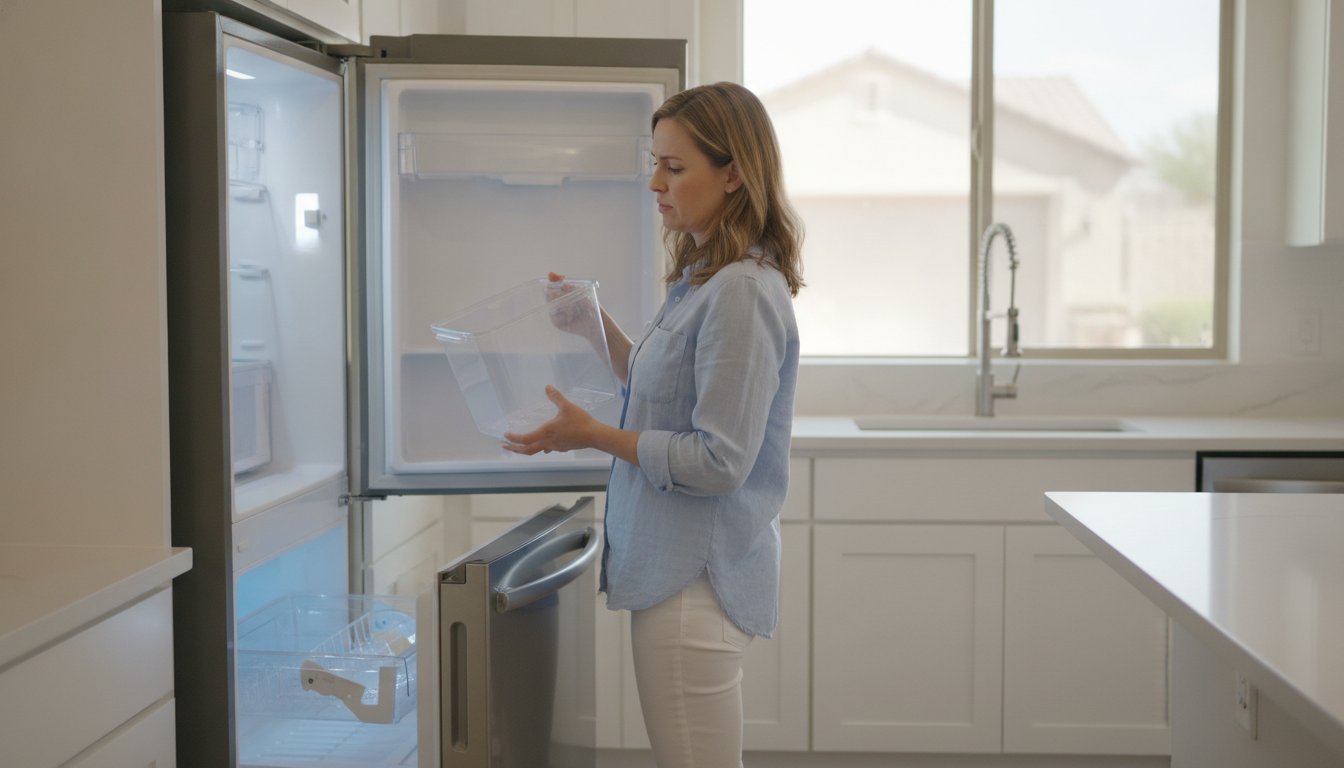
Did you know Gilbert’s water is nearly twice as hard as the national average? With a hardness level of 11.5 Grains Per Gallon, your appliances are constantly fighting mineral buildup that can stop them cold. It’s incredibly frustrating to reach for a cold drink on a triple-digit Arizona day only to find an empty bin. You shouldn’t have to deal with the stress of an empty tray or the fear of a massive repair bill just to keep your family hydrated.
If your refrigerator not making ice is ruining your afternoon, don’t panic yet. Most issues can be identified with a few quick checks. We’ll help you troubleshoot the problem and determine if it’s a simple DIY fix or if you need a professional hand here in the East Valley. This guide breaks down the five most common causes of ice maker failure, from frozen lines to hard water sediment. You’ll learn exactly how to get your ice flowing again and how to find a reliable local expert if the job gets too complex.
Key Takeaways
- Start with simple checks like the power switch and door seals to rule out easy-to-fix operational errors.
- Identify why a clogged water filter is the most frequent cause of a refrigerator not making ice and how to replace it.
- Understand how Gilbert’s hard water and extreme heat can lead to mineral scale buildup and mechanical strain.
- Learn to recognize the specific clicking or buzzing sounds that signal a failed inlet valve or motor.
- Know exactly when to stop troubleshooting and call a local expert to prevent further damage to your unit.
Quick Checks for a Refrigerator Not Making Ice
Before you assume your appliance has reached the end of its life, start with the basics. It’s often a simple oversight that halts production. If you find your refrigerator not making ice, a five-minute inspection might save you a service fee and a lot of frustration. These initial steps are designed to rule out accidental setting changes or minor physical blocks that don’t require tools to fix.
The Feeler Arm and Power Switch
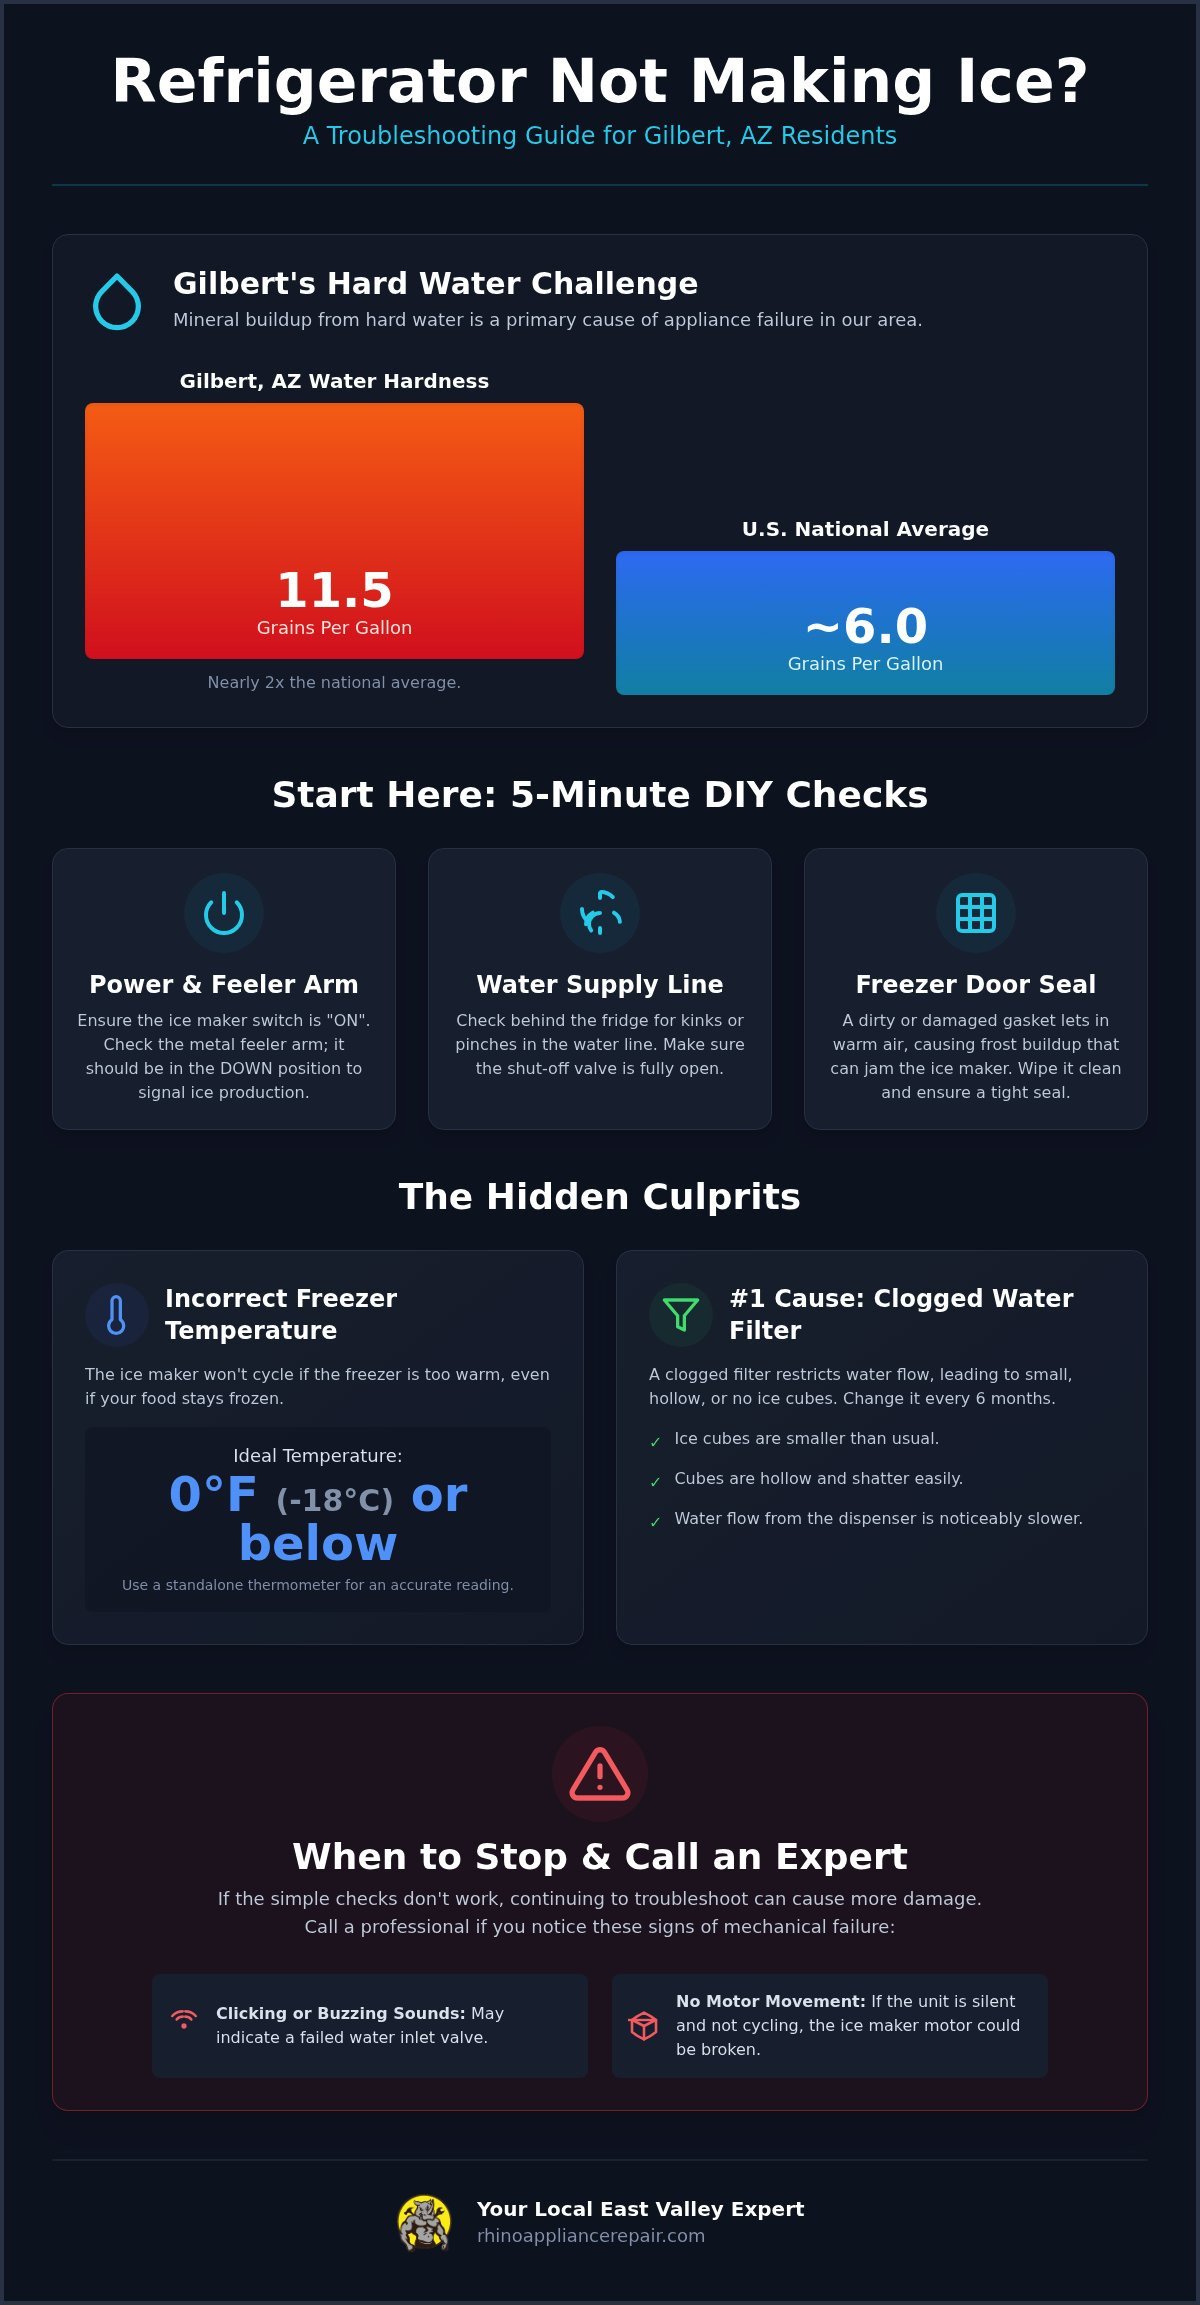
Most traditional ice makers rely on a metal feeler arm to detect the ice level in the bin. As the bin fills, the ice pushes this arm into the “up” position, which signals the machine to stop. Sometimes, a stray bag of frozen food or a large clump of ice knocks the arm into the off position prematurely. This is one of the most common reasons for a refrigerator not making ice when everything else seems fine.
Gently push the arm down to the “on” position to see if the cycle restarts. You should feel a slight click or tension when it locks into place. Modern units might use a physical toggle switch or a digital button on the front control panel instead. Ensure these are set to “On” or “Ice On.” If the arm is frozen in the up position, don’t force it. You may need to let it thaw naturally or use a hair dryer on a low setting to clear the frost.
Inspecting the Water Supply Line
Your ice maker can’t function without a steady flow of water. Check the shut-off valve, which is usually located under your kitchen sink or directly behind the refrigerator. Ensure the valve is turned fully to the open position. While you’re back there, look for physical obstructions in the tubing. Plastic and copper lines are prone to shifting or getting crushed when the fridge is pushed back against the wall.
A minor kink in the water line can restrict flow enough to stop ice production entirely without ever causing a visible leak on your floor. If the line looks pinched, carefully straighten it out to restore pressure. If the line is made of thin plastic and has a permanent crease, it might be time for a replacement to prevent a future burst.
Don’t overlook the freezer door seal. If the gasket is cracked or covered in food debris, it won’t create a tight seal. This allows humid air to seep in, causing frost buildup that can jam the ice maker’s moving parts. Use a damp cloth to wipe the seal clean and ensure the door closes firmly every time. If you notice the bin is half-empty but the sensor thinks it’s full, look for “ice bridges.” These are clumps of ice that fuse together, blocking the sensor’s infrared beam. Clearing these blocks is a fast fix that often solves the problem immediately.
Temperature and Filtration: The Hidden Culprits
Sometimes the problem isn’t a mechanical failure. It’s the environment. A refrigerator not making ice is often just reacting to a warm freezer or a choked-off water supply. These issues are subtle. Your fridge might still feel cold to the touch, and your water dispenser might still trickle, but the ice maker has quietly gone on strike.
Ideal Freezer Temperatures for Ice
For your ice maker to cycle efficiently, the internal temperature must stay at or below 0°F (-18°C). Most units are designed to wait until the mold reaches about 15°F before attempting to harvest the cubes. If your freezer is hovering at 10°F or 12°F, the thermostat never gives the “go” signal. Your food stays frozen, but the ice tray sits idle because the machine is waiting indefinitely for the right conditions.
Don’t trust the digital display on the door. Those often show the set temperature rather than the actual internal climate. Place a standalone appliance thermometer in the back of the freezer for 24 hours to get a real reading. To help maintain a steady chill, keep your freezer about 3/4 full. This provides thermal mass that prevents the air from warming up every time you open the door. If your temps are consistently high, it might be time for a professional freezer repair near me to check the condenser coils or evaporator fan.
The 6-Month Filter Rule
Clogged water filters are the single most common cause of slow or non-existent ice. In Gilbert, our water has a hardness level of 11.5 Grains Per Gallon. That’s a lot of mineral sediment for a small carbon filter to catch. Over time, this debris restricts the flow needed to fill the ice mold quickly. When the flow is too low, the mold doesn’t fill completely, leading to thin or malformed cubes.
Look for these signs of a clogged filter:
- Cubes that are significantly smaller than usual
- Hollow cubes that shatter easily in the bin
- A noticeably slower flow from the water dispenser
Change your filter every six months. Don’t wait for the “change filter” light to turn red. Those sensors often work on a simple timer rather than measuring actual water quality. If you suspect the filter is the culprit, remove it and install the bypass plug that came with your fridge. If the ice production suddenly jumps back to life, you’ve found your answer.
Mechanical Failures: When the Ice Maker Itself Breaks
Sometimes the problem isn’t just a setting or a filter. It’s a hardware failure. If you’ve checked the basics and your refrigerator not making ice is still a daily reality, it’s time to look at the mechanical components. These parts eventually wear out due to constant use, mineral friction, or electrical surges. When a physical part breaks, the machine might sound like it’s working while the ice bin remains empty.
Identifying a Frozen Fill Tube
The fill tube is the small plastic or rubber spout that pours water directly into the ice maker mold. If this tube freezes, water can’t reach the tray. You can usually see the ice blockage by looking behind the ice maker unit with a flashlight. It looks like a small icicle hanging out of the spout.
Grab a hair dryer and set it to low heat. Gently warm the tube until the ice melts and drips out. Never use high heat. You don’t want to warp the plastic components or damage the surrounding freezer liner. If this tube freezes repeatedly, it’s a major red flag. It usually means your water inlet valve is leaking slightly. That tiny trickle of water freezes before it hits the mold, eventually creating a solid plug that stops everything.
Inlet Valve and Motor Testing
The water inlet valve is an electronic solenoid. When the ice maker is ready for water, it sends a signal to this valve to open for exactly 7 to 10 seconds. If the solenoid is burnt out, you’ll get nothing. Similarly, the internal motor that drives the ejector rakes can fail. If those plastic fingers are stuck in the ice or won’t move at all, the harvest cycle stops.
Testing these parts requires a multimeter and an understanding of live electrical circuits. You’re looking for continuity in the solenoid and proper voltage from the control board. If the valve has power but won’t open, it’s dead. If the motor is receiving power but the rakes aren’t turning, the internal gears are likely stripped.
Hardware repairs like these involve high-voltage components and precise timing. If you don’t feel comfortable working with electricity or you can’t find the source of the failure, it’s time to bring in an expert. The cost of a new valve or motor is a smart investment compared to the price of a new appliance. For a guaranteed fix, schedule a professional refrigerator repair in Gilbert AZ. Our team can quickly diagnose the electrical failure and swap out the faulty part to get your bin full again.
Arizona-Specific Ice Maker Issues (Hard Water & Heat)
Living in the East Valley means dealing with environmental factors that most national repair guides completely ignore. If you find your refrigerator not making ice, the cause might be right in your tap or the air outside. Our local climate and water chemistry put a unique strain on residential appliances. In Gilbert, these factors turn minor maintenance tasks into essential survival steps for your fridge.
Hard Water and Your Inlet Valve
Gilbert water is officially classified as “very hard,” sitting at 11.5 Grains Per Gallon. This high mineral content is a primary reason for local ice maker failure. As water passes through your system, calcium and magnesium leave behind solid white deposits. These minerals eventually seize the delicate internal parts of your water inlet valve. Local homes see significantly more sediment clogs than the national average because our water is almost twice as hard as the U.S. baseline.
When these deposits build up, you might be tempted to try cleaning the valve with vinegar or a descaler. This is rarely effective. The internal seals and solenoids are too small and precise for a manual cleaning to restore original performance. A full replacement is the only way to ensure a reliable seal and prevent leaks. To extend the life of your next valve, we strongly recommend installing a home water softener to pull those minerals out before they reach your kitchen.
Managing Performance in the East Valley Heat
The Arizona heat is the other half of the problem. Most refrigerators are designed to operate in ambient temperatures between 60°F and 90°F. During our summer months, even an indoor kitchen can hover near that upper limit. For every 10°F increase in ambient temperature above 70°F, your refrigerator’s energy consumption increases by approximately 10-15%. This puts your cooling system under massive pressure.
A dusty condenser coil makes this even worse. When the coils are covered in pet hair or dust, the fridge can’t shed heat efficiently, which prevents the freezer from reaching that critical 0°F mark. An overtaxed compressor will always prioritize cooling your food over making ice to prevent spoilage. Vacuum your coils at least twice a year to keep the airflow clear. If your unit is struggling to keep up with the desert sun, it’s time for a professional freezer repair near me in the East Valley to check your compressor health and coolant levels.
When to Call Rhino Appliance Repair in Gilbert, AZ
DIY fixes are great for saving money, but they have limits. If you’ve swapped the filter and verified the temperature but still have a refrigerator not making ice, the problem is likely internal. Some failures require specialized tools and diagnostic software that aren’t found in a standard home toolbox. Knowing when to stop and call an expert can save you from accidentally making a small problem much worse.
Listen closely to your appliance for warning signs. Loud clicking, buzzing, or humming noises from the rear often signal a struggling solenoid or a seized motor. If you spot water pooling at the base of the unit or slush forming in the bin, shut off the water valve immediately. These leaks can cause expensive floor damage if they aren’t addressed quickly. While it’s tempting to probe the control board yourself, modern smart fridges are complex. DIY electrical testing on these units is dangerous and can lead to a total board failure. Just as with a dryer not heating repair, tackling complex appliance electrical issues without the right expertise can turn a manageable fix into a costly replacement.
The Value of Professional Diagnostics
A proper diagnosis prevents “parts cannon” repair where you spend money on components that aren’t actually broken. A skilled technician can quickly tell the difference between a failing inlet valve and a malfunctioning main control board. This distinction is critical for your wallet. Rhino Appliance Repair is committed to providing honest residential service. We treat you like a neighbor because we are your neighbors. You get the relief that comes with a guaranteed fix from a family-owned team that takes pride in quality craftsmanship.
Fast Help for East Valley Homeowners
We serve Gilbert, Mesa, Chandler, and the surrounding East Valley communities. When your ice production stops in the middle of a desert summer, you need speed. We focus on major residential brands and understand the specific toll our climate takes on them. Our goal is to move you from a state of disruption to a state of resolution as quickly as possible.
To help us work efficiently, please clear out the freezer area near the ice maker before your appointment. This gives our tech immediate access to the components for a faster fix. Don’t let a broken appliance ruin your week or leave you with warm drinks. Schedule your ice maker repair with Rhino today!
Restore Your Ice Production Today
Dealing with a refrigerator not making ice is a common headache for Gilbert homeowners. Between the very hard water and the intense desert heat, your appliance works overtime. You’ve learned how to check the basics like the feeler arm and the water filter. You also know that keeping your condenser coils clean is vital for surviving an Arizona summer.
If the simple fixes didn’t do the trick, don’t let it stress you out. Rhino Appliance Repair is a family-owned business that has served the East Valley since 2020. We provide expert service for all major residential refrigerator brands. Our team is highly rated for fast, friendly troubleshooting that gets to the root of the problem without the guesswork. We’re here to restore your comfort and your cold drinks.
Get your ice maker running again with Rhino Appliance Repair. You don’t have to settle for lukewarm beverages. We’re ready to help you get back to a fully stocked ice bin and a cool home today.
Frequently Asked Questions
How long does it take for a refrigerator to make ice after installation?
It typically takes a full 24 hours for a new refrigerator to reach the proper operating temperature and begin producing ice. During this initial cooling period, the unit prioritizes lowering the temperature of the main compartments before the ice maker starts its first harvest cycle. It is best to discard the first three full batches of ice to ensure any dust or residue from the new water lines is flushed out completely.
Why is my ice maker making small or hollow ice cubes?
Small or hollow cubes are a classic sign of low water pressure. This usually happens when a water filter is clogged or the inlet valve is partially blocked by mineral scale. If the mold doesn’t fill entirely during the short 7 to 10-second fill window, the cubes won’t have enough mass to freeze solid. Checking your filter for a blockage is the first step in resolving this common issue.
Can I replace my own refrigerator water inlet valve?
While a handy homeowner can technically replace an inlet valve, it involves working with both pressurized water lines and live electrical connections. One wrong move can lead to a slow leak behind the fridge or a dangerous electrical short. If you aren’t comfortable using a multimeter to verify power or ensuring a watertight seal on plastic tubing, calling a local professional is the safer choice to protect your home from water damage.
Why does my ice maker smell or taste like plastic?
If your fridge is new, the plastic taste often comes from the new internal supply lines. Flushing several gallons of water through the system usually clears this up within a few days. In older units, ice acts like a sponge and absorbs odors from uncovered food in the freezer. Regularly cleaning your ice bin and keeping an open box of baking soda in the freezer can help keep your ice tasting fresh.
How do I reset my refrigerator ice maker?
Most units have a physical on/off switch or a wire feeler arm you can toggle to trigger a reset. For modern digital models, you might need to hold a specific button combination on the door control panel, like “Ice Type” and “Child Lock,” for three to five seconds. Check your owner’s manual for the exact sequence. A successful reset often results in a chime or the motor turning briefly to start a new cycle.
Is it worth repairing an ice maker on an 8-year-old refrigerator?
Yes, repairing an ice maker is often worth the investment even on an 8-year-old unit. Most ice maker components are modular and relatively affordable compared to the cost of a new high-end refrigerator. Since the average fridge lasts about 10 to 14 years, a quick repair can give you several more years of reliable service. We recommend weighing the repair cost against the overall mechanical condition of your appliance.
What is the most common reason an ice maker stops working?
A clogged water filter is the most frequent reason for a refrigerator not making ice. Over time, the filter traps sediment and minerals, eventually restricting flow so much that the ice mold never fills. In Arizona, our hard water accelerates this process significantly. If the filter isn’t the issue, a frozen water fill tube is the next most likely culprit we see during service calls in Gilbert homes.
Does a clogged water filter affect the water dispenser too?
Yes, a clogged filter affects every part of your fridge that uses water. You will notice a significantly slower flow from the dispenser and a decrease in ice production at the same time. Because the water for both systems passes through the same filtration cartridge, a blockage there acts as a bottleneck for the entire unit. Replacing the filter every six months ensures both systems stay functional and provide clean water.


Pingback: Fridge Not Cooling? Check These 5 Things First
Bài chia sẻ chất lượng. Ai đang tìm hiểu du học Hàn Quốc có thể liên hệ Letco — hỗ trợ chọn ngành, học bổng và thủ tục visa nhanh gọn. Chi tiết ở letco.vn.
Pingback: Same Day Appliance Repair Gilbert AZ | Fast, Local Residential Service – rhinoappliancerepair.com